K Thomas Lawson is proud to be a division of Bartlett Tree Experts, and our staff now has the backing of an international tree-care company and tree research laboratory to help continue providing excellent tree service and shrub care in the Charlottesville, Virginia area. View a complete list of professional tree services offered by Bartlett.
Planting a New Tree?
Once you have chosen a new tree and you are ready for planting, take a little bit of time to learn how to plant correctly. It's very easy to insure that your new tree will survive and THRIVE!
Read over the tree planting instructions (use the hot links) to get a feel for what you're trying to accomplish.
Did you buy, or are you considering a tree that is:
- Bare-root or
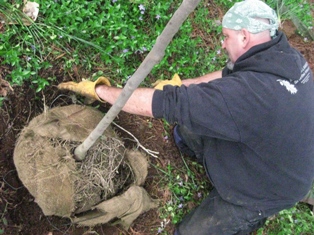
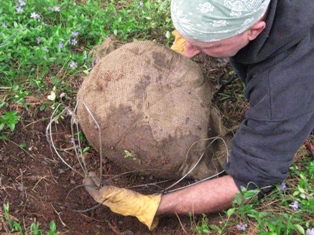
- balled & burlaped
- If you have a container-grown tree, treat it similarly to the balled and burlapped tree, making sure to carefully observe the roots and disentangle them.
These instructions are fine for most trees, including dogwood trees,
cherry trees, fruit trees, Japanese maple trees, and oaks, maples, and
evergreens of all kinds.
Now check out MULCHING correctly!
Additional Resources on the Value of Planting Trees
Most people don't need reasons to plant new trees, but sometimes the facts and figures can be an amazing incentive. Organizations such as American Forests and Treelink.org are helping homeowners, researchers and businesses value trees more. You might enjoy learning more from them. Also check out The Arbor Day Foundation!

Leave Planting..., and return to Do It Yourself
Leave Planting ... and return to Homepage